|
Online Patternmaking Classes
by Don McCunn Bust Sling Home Page ► Week Four
Garment Design VariationsIn this week we will look at how to style the basic Bust Sling pattern into a swim top, a dress, and a gown. These garments show how to change the basic Bust Sling pattern to different seam lines. A skirt is added for the dress and gown. Step-by-step written instructions are available in the book How to Make Custom-Fit Bras & Lingerie. Specific page references are included for each style. Contents
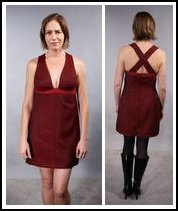
The process of changing the basic Bust Sling pattern into a princess seam can be useful for a variety of designs. The videos below show how to perform this function. For step-by-step written instructions, see page 79 in the book. For step-by-step written instructions for draping a skirt, see page 90 in the book Two Piece Princess Seam Three Piece Princess Seam Draping a Skirt Swim TopThis swim top uses a two piece princess seam pattern for the top. It has rings located at the top, center front, and sides. The straps are made from the fashion fabric and are convertible. To allow the straps to be changed to different configurations they are fashioned like a bra strap. The strap passes through a ring at the top of the swimsuit and is then threaded through a buckle which is like a large bra strap slider. The straps can be changed to provide either a pair of straps for a "X" back closing or to a top with ties at the neck and another set of ties at the rib cage. To create the pattern for the swim top, start by taping together a poster board copy of the two piece princess seam pattern. For step-by-step written instructions, see pages 93 to 95 in the book. Bottom Pattern Top Pattern Sewing the Body Sewing the Elastic Sewing the Rings Fashion Fabric Straps Princess Dress This dress uses the three piece princess seam pattern and "X" back straps. There is a zipper closing with hook and eyes at center back. The skirt is attached to a 1" band around the rib cage. The rib cage band is reinforced using fusible interfacing and has side seams to allow for adjustments to the fit as necessary. This example has no elastic. However, elastic can be added at the rib cage if desired. Whenever you are working with a new version of a pattern I suggest you sew an initial version basting any seams that may require additional fittings such as the side seams and the correct placement and length of the straps for an "X" back. The videos below do not include the initial steps of sewing the skirts. For step-by-step written instructions, see pages 96 to 97 in the book. Sew the Top, Part One Sew the Top, Part Two Finishing the Dress Finishing Touches Full Length Gown This full length gown uses a six panel top based on a double band Bust Sling Bra. The panels are not that obvious on the gown so I have created a rainbow colored top using the pattern to illustrate the location of the seams. The gown uses "X" back straps. There is a zipper closing with a hook and eye with an overlap at center back. The skirt is attached to a band around the rib cage. For the rib cage band I used a side seam so the fitting of the garment could be refined. The zipper is installed in the fashion fabric. This example is made from sheer fabric so I created a lining for the skirt that stops above the knee. The process for creating the pattern for the top illustrates how the Bust Sling Bra can be changed to different seam locations. When you are creating multi-piece patterns like this, it is important to carefully determine each step you need to follow. For step-by-step written instructions, see pages 98 to 99 in the book. Design the Pattern Sewing Sequence Sew the Top, Part 1 Sew the Top, Part 2 Finish the Gown Bust Sling Home Page ► Week Four
Copyright © 2007, & 2020 by Donald H. McCunn
|